Apply for a sender ID
Register the name your customers see on your SMS, track the approval and choose your default sender ID.
Last reviewed
Your sender ID is the name recipients see instead of a phone number — for example MySchool. Many networks only deliver messages from registered sender IDs, so you need an approved one before you can send.
Country-specific notes
Sender ID rules differ by country. The application form in the app covers the Kenyan networks (Safaricom, Airtel and Telkom), and the documents and steps below are the Kenyan requirements. To send with your sender ID in other countries, contact us and we'll tell you what each country needs.
Before you start
Have these ready as PDF, JPG or PNG files:
| You are | Documents |
|---|---|
| A company | Certificate of Registration / Incorporation, KRA PIN certificate (Kenya's tax registration), ID or passport of an authorised representative |
| An individual | National ID or passport, KRA PIN certificate |
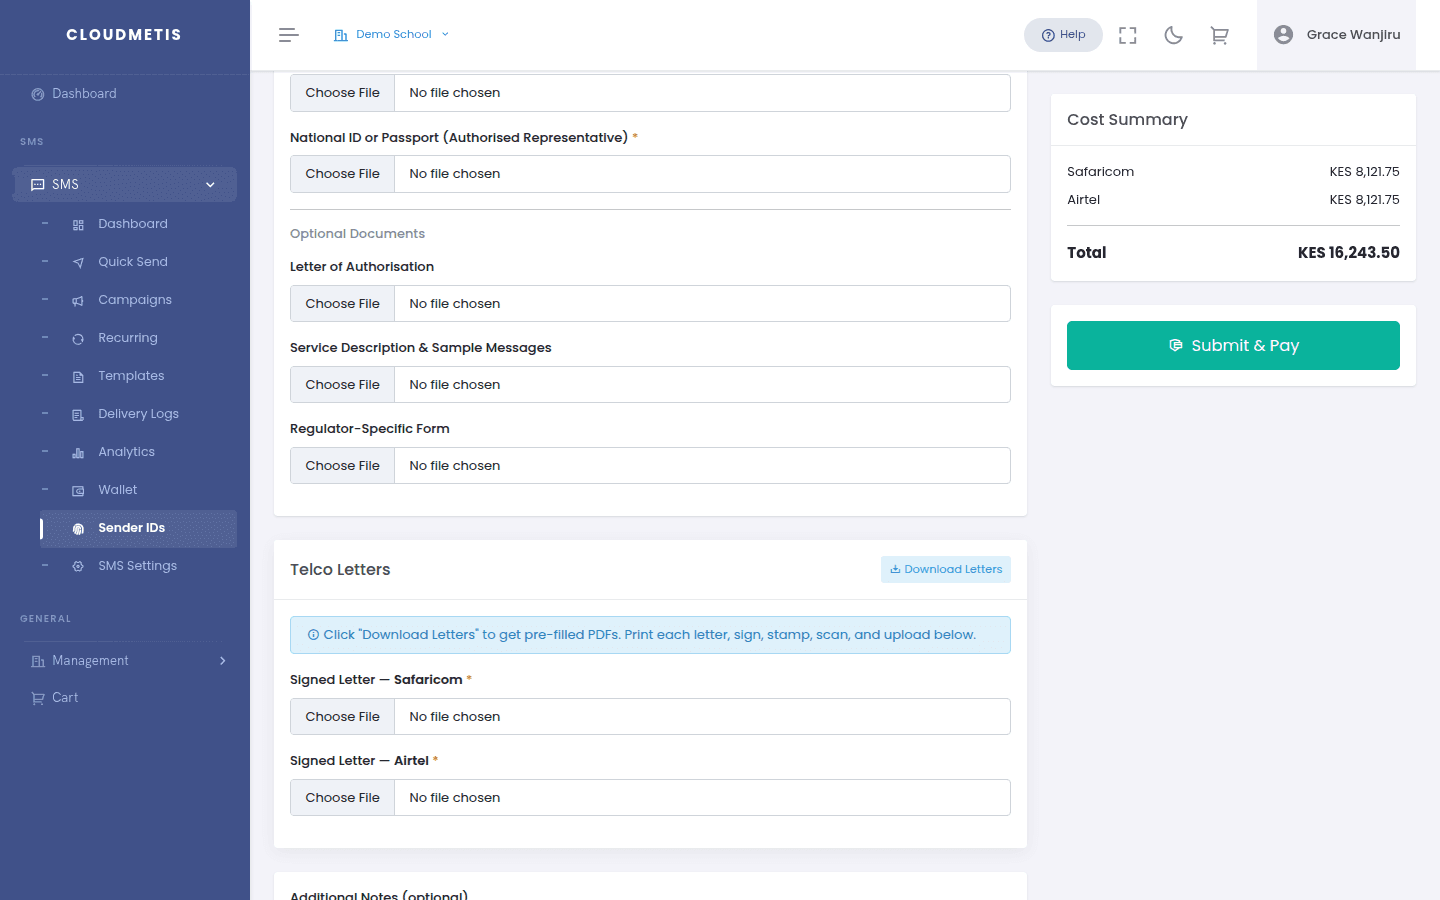
Optional: a letter of authorisation, a description of your service with sample messages, and any regulator-specific form.
Apply
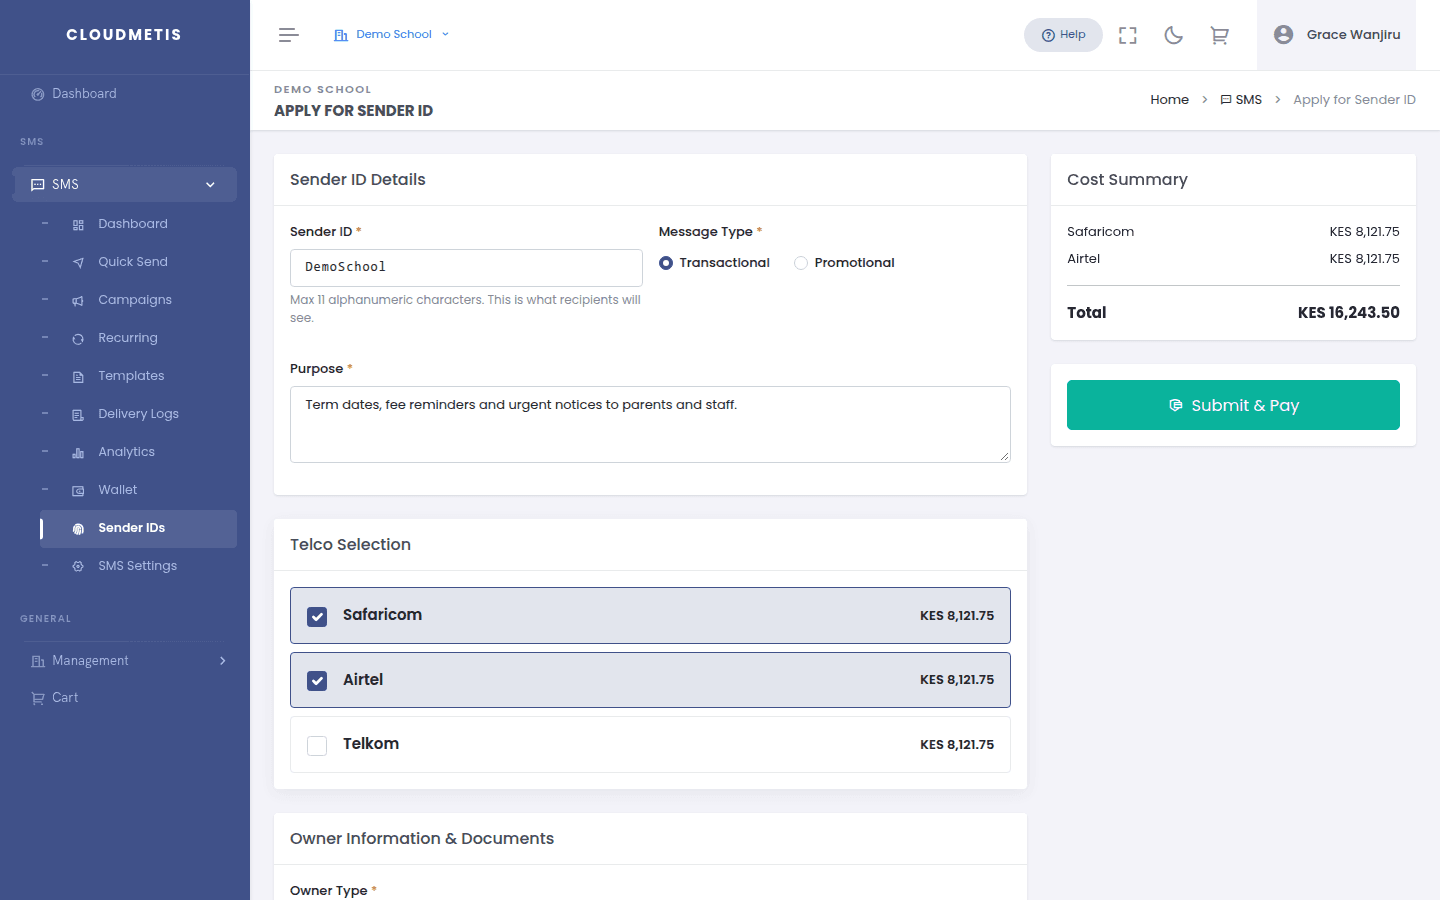
- Go to SMS → Sender IDs and click New Application.
- Sender ID Details
- Sender ID — up to 11 letters and numbers. This is exactly what recipients will see.
- Message Type — Transactional (receipts, OTPs, alerts) or Promotional (offers, marketing).
- Purpose — a short explanation of what you'll send.
- Telco Selection — tick the networks you need (Safaricom, Airtel, Telkom). The price for each is shown.
- Owner Information & Documents — choose Company or Individual and upload the documents.
- Telco Letters — click Download Letters. Print each letter, sign and stamp it, scan it, and upload it for each network you selected.
- Add any Additional Notes, check the Cost Summary, and click Submit & Pay.
Payment opens in a secure window (card, bank transfer or mobile money such as M-Pesa). If you close it, your application is still saved — pay later from Management → My Invoices.
Track your application
Open SMS → Sender IDs and click your application. The progress bar shows each step:
Payment → Under Review → Sent to Telcos → Approved
Each network approves separately, so you may see Safaricom approved before Airtel or Telkom. Approval times are set by the networks.
If your application is rejected, the reason is shown at the top. Fix the issue and click Resubmit — you can change the sender ID, but you'll need to sign the telco letters again.
Choose your default sender ID
If you have more than one, set the one used by default in SMS → SMS Settings with Set Default. You can still pick another one when sending.